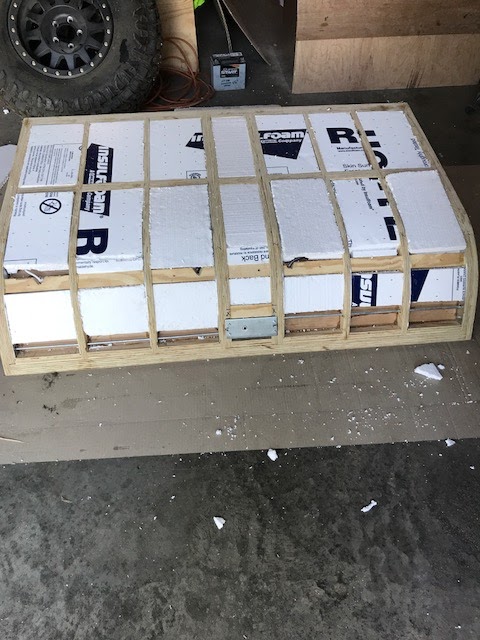
Back onto the hatch. I finished installing the balance of the insulation in the hatch frame. I needed to leave the insulation out near the bottom so the hatch latch rods would operate freely. The insulation was glued into place to keep the insulation from sliding down and interfering with the rods.
 |
| Insulated Hatch |
 |
| Insulated Hatch View 2 |
I cut the exterior plywood skin of the hatch as wide as the trailer (60 inches wide). The hatch frame was constructed 56-1/2 inches wide to account for the wall thickness of the trailer and 1/4 inch gap between the sidewall of the trailer and the hatch side frame. I plan on using the exterior skin of the hatch to rest on the seal to enclose the galley area. I took this design from a gentleman who posted his build on-line "Atma Travelear Trailer". This guy was great at AutoCAD and had some good details to work from. His detail is the photo below.
 |
| Atma Travelear Trailer Hatch Seal Design |
 |
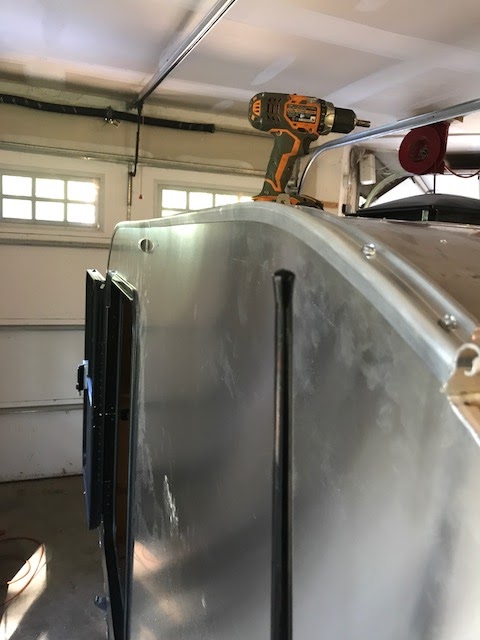
| Cut Top Sheet for Hatch to Width |
 |
| Cutout Needed for Hatch Latch Mechanism |
 |
| Cutout Made for Hatch Latch |
 |
| Aligning the Top Sheet for Overhang |
 |
| 1-3/4 Inch Overhang for Seal |
 |
| Exterior Skin Glued and Screwed |
 |
| Screw Holes Filled with Bondo |
 |
| Final Surface after Sanding - Ready for Aluminum Skin |
I did cut the hatch sheet just a little wider than the 60 inches required in case the sheet did not align perfectly. I had a consistent 1-3/4 inches on one side so I trimmed off the other end. On all my curved pieces, I made a couple extra ribs / templates that have come in handy for many reasons. Below is an example where the spare rib was clamped onto overhang so I could use the flush cut router bit to trim off the excess.
 |
| Rib Used as Router Guide |
 |
| Approximately 1/4 inch Needed to be Routed Off |
I need to pickup the aluminum skin to cover the hatch so I will try and get a lot of loose ends cleaned up. I order some door stops and door hasps to keep the doors from banging into the trailer and to prop the doors open if desired.
 |
| Rubber Door Bumper |
 |
| Bumper Aligned with Door Cross Frame |
 |
| Door Catch, Spring Loaded |
 |
| Door Catch, Open Position |
 |
| Door Catch Holding Door |
 |
| Full View of Door Bumper and Catch Installed |
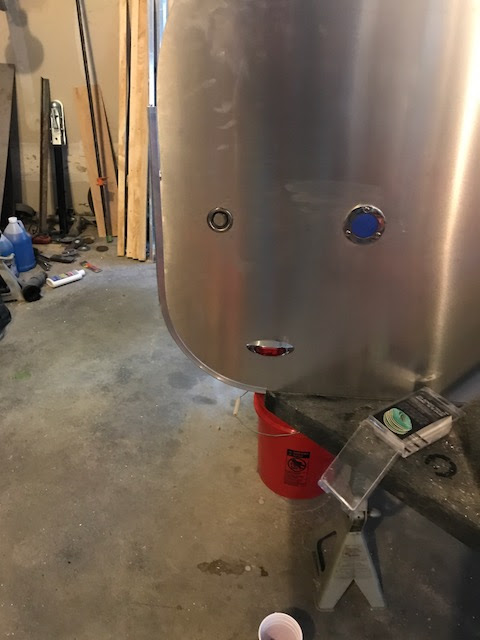
As much as I didn't want to take the water tank out of the back compartment, I needed to run the wiring for the aft running lights, and the aluminum support edge for the cutting board didn't really hold in place with Gorilla Glue, so screws needed to be installed to support the cutting board lip. The tank removal wasn't really that bad, it took approximately 20 minutes to unhook everything, remove the retainer bracket and slide the tank out.
 |
| Water Tank Removed |
 |
| Screws Installed for Cutting Board Support Lip |
I got around to finishing the majority of the exterior trim on the trailer this weekend, and since most builds that I looked at on the web did not go into great detail on the trim out of the exterior, I got kind of picture happy in hopes it helps a future builder.
I curved the rear trim pieces as before, using the form I made to curve the front pieces. I ran the pieces long as I was not quite sure how to terminate the piece at the galley counter top.
 |
| Rear Edge Trim with 9 Inch Radius |
 |
| Rear Trim with Overrun |
 |
| Counter Top Trim Integrated into Trailer Edge Trim |
 |
| Closeup of Fit |
 |
| Top View |
 |
| Adding Trim Strip |
 |
| Bevel the Trim Strip Insert to Lay Flat |
 |
| Work the Plastic Molding Under the Counter Top Edge Trim |
 |
| Finish Trim Driver Side |
 |
| Finished Trim Passenger Side |
 |
| Finish Counter Top Trim Top View |
 |
| Profile View, 1/16 Inch Offset at Ends |
 |
| Overall View of Completed Back End Trim |
The area where the edge trim meets the hurricane hinge is a tricky spot, as this is the location where water is most likely going to enter the galley at the corner point. Also, the flange is the only part of the hurricane hinge that gets mitered, the curved hinge piece needs to remain in tact for the hatch half of the hinge. This area also acts like a small dam where water can sit so I generously applied caulk at this joint.
 |
| Miter Joint at Hurricane Hinge and Edge Molding - Passenger Side |
 |
| Miter Joint at Hurricane Hinge and Edge Molding - Driver Side |
 |
| Overall View of Hurricane Hinge and Edge Molding Fit-up |
 |
| Butt Joint of Edge Molding - Passenger Side |
 |
| Overall View of Passenger Side Trim and Butt Joint |
 |
| Butt Joint of Edge Molding - Driver Side |
 |
| Overall View of Driver Side Trim and Butt Joint |
 |
| Miter Cut of Plastic Trim Insert |
 |
| Completed Joint with Plastic Trim Insert |
 |
| Overall View of Completed Trim - Driver Side |
 |
| Miter Joint of Plastic Insert - Passenger Side |
 |
| Overall View of Completed Trim - Passenger Side |
I may have caused some problems for myself by doubling up the plywood in the back of the trailer where I spliced the plywood for an overall trailer length of 9 ft. There are some easier solutions with prefabricated aluminum shapes to assure the hatch completely covers the seal, but with a 1-1/2 inch thick wall, those shapes are not available. I am improvising and do not have it completely figured out yet, but either way, I can finish getting the seal installed and trim out the galley area where the hatch cover will rest.
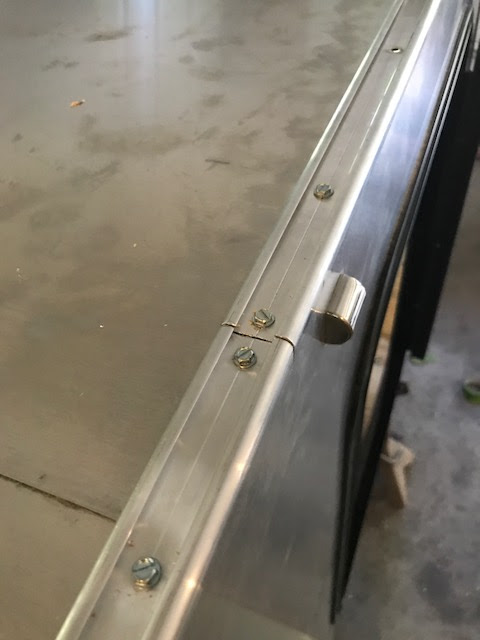
I took 1-1/2 inch wide aluminum flat stock, 1/16 inch thick to cover the end of the 2 layers of plywood where the splice occurred.
 |
| 1-1/2 Inch Wide Aluminum Sealed and Screwed to Cover End Grain |
 |
| View No. 2 - Passenger Side |
 |
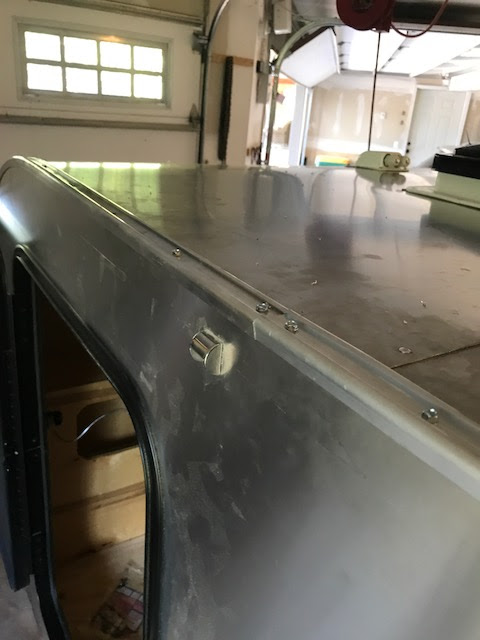
| Aluminum Trim over Drivers Side |
The 1-1/2 inch wide aluminum fit perfectly with no trimming needed. I placed the screws in the center of the flat stock, knowing the galley edge trim (Shown Below) is 1-1/8 inch wide and the galley edge trim would cover the screws previously installed to mount the flat stock. The galley edge trim was the closest profile match I could find to the main trailer trim with the shortest leg to closely match the main trailer trim edge in profile due to the seal recess.
 |
| Trim Profiles |
 |
| Trim Layout Covering Previous Screw Holes |
 |
| Trim Notched to Fit Under Hurricane Hinge |
 |
| Trim Dry Fit |
 |
| Trim Final Shaping |
 |
| Overall View of Profile Lines between Hatch and Main Cab |
 |
| Galley Edge Trim Terminates at Galley Counter |
 |
| View of Driver Side |
 |
| Driver Side Trim Interface |
 |
| Overall Profile View - Driver Side |
 |
| Driver Side Profile Termination at Counter Top |
 |
| Driver Side Profile Termination at Counter Top - View 2 |
 |
| Galley Hatch Seal Sample |
 |
| Galley Hatch Seal - Perfect Width for Channel |
 |
| Seal will Run Full Length |
 |
| Cross Section of Galley Hatch Seal |
 |
| Seal Fits Nicely through Curve |
 |
| Seal Compresses to Appropriately 3/16" Thick |
Now it's time to finish the exterior skin on the hatch and complete the battery compartment. One to two more weekends and this thing should be ready for the road. I will consider ordering the mattress this week!


No comments:
Post a Comment