One can't really go too many places without having a place to store the toys, ie: kayaks, so I decided to get the roof rack built. In addition, it would be nice to get the awning permanently installed.
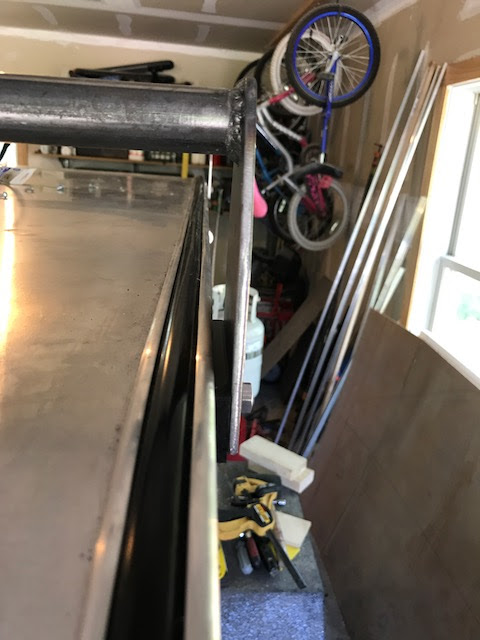
I didn't want to get real fancy with the rack, but wanted to make sure the roof rack would accommodate the majority of accessories built by the major rack manufacturers. I sized the cross bars around the Yakima line which is a 1 inch outside diameter bar. or 3/4 inch ID tube. In addition, I did not like the way the awning was designed to attach to round tubes (angle brackets and pipe clamps) so I designed the upright post on the passenger side to accommodate the awning track style mount which I believe is a much more secure attachment.
I used 3/16 inch thick plate, cut into 3-1/2 inches wide by 6 inches tall. I cut the brackets into a shape I thought would look good and began the fit-up.
 |
| Cutting the Support Brackets to Shape |
 |
| Driver Side Brackets Shaped and Ground |
 |
| Proposed Installation Location for Cross Bars, Sufficient Room for Weld |
The corner trim on the trailer requires the brackets to be offset approximately 1/4 inch to clear the trim, so I purchased a 3/8" thick sheet of black HDPE to use a the shim material. This 1 ft x 1 ft sheet costs $8 at Granger and it was available the next day. I cut 1 inch wide strips and drilled some holes in the HDPE and the spacer brackets were done.
 |
| HDPE Sheet Used for Spacers Behind Brackets |
 |
| 3/8 Inch Thick HDPE Sheet |
After cutting and drilling the spacers and brackets, I installed the brackets onto the trailer with 5/16 inch x 1-1/2 inch long SS lag screws. I squared everything up before cutting the cross tubes to length and tack welding the tubes to the brackets.
 |
| Tack Welding Cross Tube to Bracket - Passenger Side |
 |
| Tack Welding Cross Tube to Bracket - Driver Side |
 |
| Welding Complete, Final Fit-up Before Paint (Driver Side) |
 |
| Welding Complete, Final Fit-up Before Paint (Passenger Side) |
 |
| HDPE Spacer |
 |
| HDPE Spacer - View 2 |
 |
| Roof Rack - Driver Side |
 |
| Roof Rack - Passenger Side |
 |
| Roof Rack after Paint |
 |
| Roof Rack after Paint |
 |
| Roof Rack Final Install |
 |
| Awning Installed on Passenger Side in Track Mount |
 |
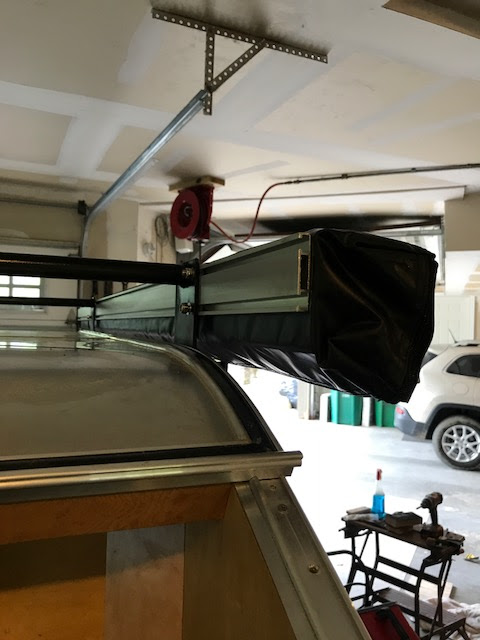
| Overall View of Awning Mounted on Roof Rack |
I decided to move forward with the television installation. I order a 24 inch smart TV to cut down on the clutter of equipment such as DVD players and antennas. Knowing that, in most cases wherever we go, we will be out of reception for a TV signal, so with the smart TV, we can download a few movies to the iPhone or stream television from an app which will wireless connect to the smart TV with no extra equipment needed in the trailer. I installed the TV on a full motion TV mount so we can access the pass-through when necessary and secure the TV to the back wall when in transit. I have yet to figure out the strap down arrangement.
 |
| TV up against Back Wall |
 |
| TV Pulled Forward |
 |
| TV Rotated to Side for Pass-Through Access |
It doesn't make much sense to me, but I have to use an inverter for the television to take my 12V outlet and convert the power to 110V so that the TV can be plugged into a conventional outlet, then convert the power back down to 12V internally to make the TV work. I will figure something different out later; on a rainy day!
Before I permanently install the battery box, I need to install a trim piece at the front where the aluminum skin terminates against the frame at the front of the trailer. As you can see below, there is a slight gap where water and moisture can get in. This will be covered with 3/4 inch x 3/4 inch aluminum angle with sealant.
 |
| Slight Gap @ Aluminum Sheet Termination and Frame |
 |
| Angle Pre-drilled at Rib Locations on Front End |
 |
| Sealant Applied and Screwed |
 |
| Final Install of Trim / Drip Edge |
 |
| View from Front |
I applied the same seal strip used for the hatch and battery lid on the trim piece I installed on the leading edge of the battery box installed last week. This will compress against the main trailer to keep water from entering. This is a temporary solution, as I want to trim the interface between the battery box and main trailer with aluminum angle. To find someone who can roll form a 3/4 x 3/4 inch aluminum angle to this shape mid-summer (height of the construction season) is next to impossible. I will work on finding someone to do this later this fall or winter, but this should work for now.
 |
| Seal Installed on Battery Box Interface Edge |
 |
| Closeup of Seal, Uncompressed |
 |
| Seal Up Against Main Trailer Body - Passenger Side |
 |
| Seal Up Against Main Trailer Body - Driver Side |
 |
| Top View of Seal Compressed |
 |
| Top Edge to Receive Angle Trim |
 |
| Anticipated Trim to Cover Gap and Allow for Movement |
Earlier in the build when I had the trailer off the jack stands, I noticed the tongue of the trailer flexed a little bit, so the gap and seal will allow the battery box to move slightly without denting the aluminum on the front of the trailer.
Several months ago I purchased the converter for the trailer so I could size the battery box. The unit is a PD4000 Power Converter from Progressive Dynamics. This converter comes highly recommended for it's size and functionality. It converts 110AC Voltage to 12VDC and also has a battery charger incorporated into the unit. The right side of the panel is 110 and can accommodate 4 circuit breakers and the left side of the unit is the converter and 12 VDC operation with 12 branch circuits. They state you are not to install the converter in the same space as the battery, but I am assuming that is for concerns over explosions due to electrical components and gassing of the battery in the same space. I am using an Armored Glass Mat (AMG) battery which is sealed and reduces the concern. I also installed some vents for air distribution and allows the converter to remain cool.
 |
| PD4000 Power Converter from Progressive Dynamics |
 |
| Power Converter Installation |
The power converter has 12 pig-tails coming out of the back of the unit, so instead of having a disorganized mess of wire nuts behind the converter, I installed a busbar to connect the leads coming from the converter, then terminated the wires from the trailer into the other side.
 |
| Pig-tails Coming from Converter into Busbar |
 |
| Wires from Trailer Terminated in Topside |
 |
| Grounding Bus above Shore Power Cutout |
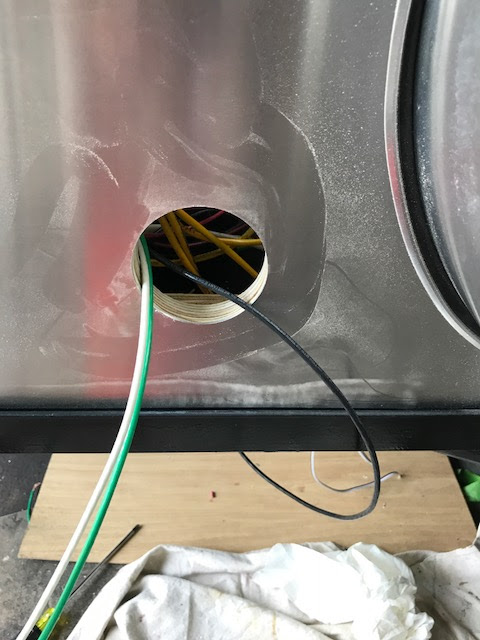 |
| Shore Power Leads thru Cutout |
 |
| Shore Power Receptacle Installed |
 |
| Shore Power Receptacle Installed |
 |
| Shore Power Receptacle Installed (Inside View) |
 |
| Vents Installed Passenger Side |
I found some small, 1" dia. vents on Amazon which fit my needs. I didn't want a single larger vent, as I felt this would allow more water to enter the box from tire spray if pulling the trailer on a rainy day.
 |
| Closeup of 1" Diameter Vents |
 |
| Vents on Driver Side |
To finish up the battery box, I needed to complete the framing around the converter, install a battery hold down, fire extinguisher and I added a shelf above the equipment to store miscellaneous camping items
 |
| Framing Around Converter |
 |
| Battery Hold Downs |
 |
| Fire Extinguisher |
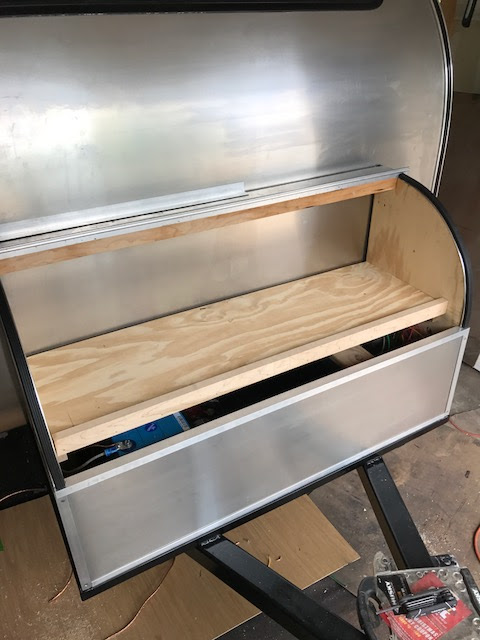 |
| Installed Removable Shelf for Misc. Items |
 |
| Folding Chairs, Extension Cords, Etc. |
It's nice to have all the electrical up and running. I was only able to test one circuit at a time with a small battery, now I can run everything all together. I'm glad to see all the circuits survived the build.
Next - Complete skinning the galley hatch in aluminum and the build is ready for a trial run.


No comments:
Post a Comment