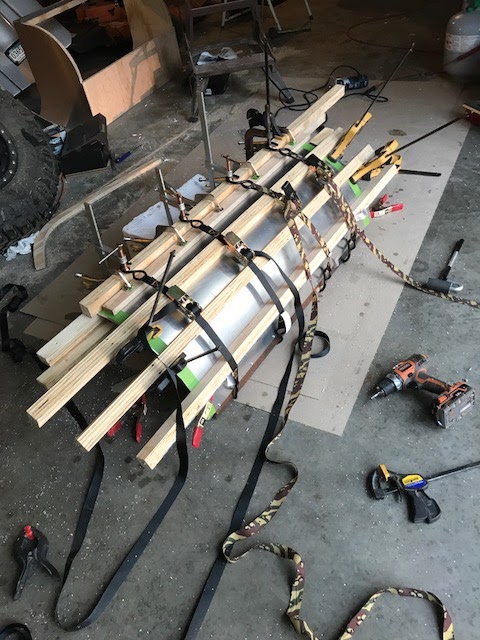
It's time to move onto the battery box and get things finished up with the enclosure. I didn't want to have the curved lid aluminum roll formed since the roll forming machines scratch the aluminum surface, nor did I want to pay an extra $100 to have the process performed. The radius on the hatch is 12 inches and I felt I could get the aluminum to conform the the shape if I do a thorough job of clamping. Best way was to clamp one of the leading edges and progressively work the aluminum to the opposite end.
 |
| Clamping the Aluminum Skin to Battery Box Lid |
 |
| Clamping of Leading Edge |
I let the contact cement cure over night then stripped all the clamps. There are a couple areas in the middle of the curve that slightly raised up, but overall, I am happy with the outcome of the aluminum bond. Once I figure out how I want to trim out the edges of the battery hatch lid, the edges will be riveted through the edge trim arrangement and the aluminum skin will remain secure.
 |
| Battery Compartment Hatch with Aluminum Skin |
 |
| Edges Need to be Trimmed to Length - Passenger Side |
 |
| Edges Need to be Trimmed to Length - Driver Side |
 |
| Cutoff Line Marked on Underside - Driver Side |
 |
| Cutoff Line Marked on Underside - Passenger Side |
 |
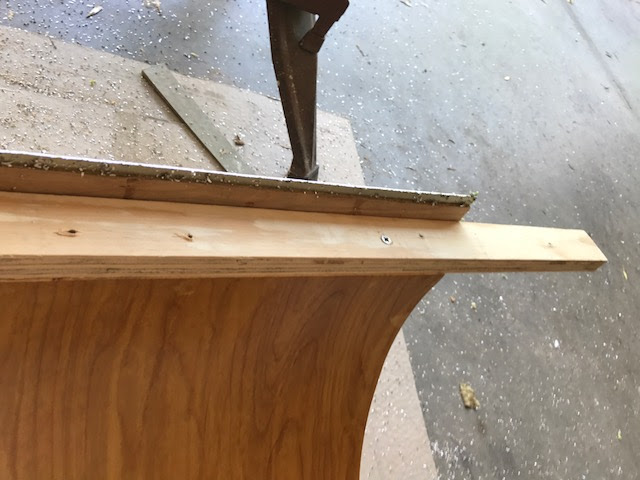
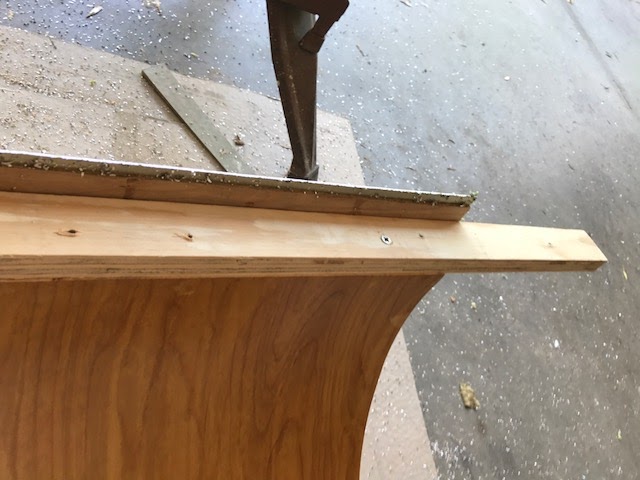
| Spare Rib Used for Flush Cut Router Guide |
 |
| Cut Progression - Need to Relocate Clamp to Finish the Cut |
 |
| Finished Edge in Curve Section |
 |
| Edge at Bottom of Lid to be Trimmed |
 |
| Screw-on Router Guide for 3/4 Inch Overhang |
 |
| Aluminum Skin for Front Panel of Battery Box - Glued |
 |
| Taped Off for Routing |
 |
| Channel Edge Trim for Front Lip - Notched |
 |
| Front Lip Edge Trim Installed |
 |
| Lip Edge Trim - View from Inside of Box |
I purchased some trim pieces from a distributor located in town called Eagle Molding in Loretto, Minnesota, approximately 20 miles outside of Minneapolis and they have an enormous amount of extruded aluminum shapes. The one pictured below is 3/4 inches wide with a 3/16 inch lip and is perfect for trimming out the edges of plywood. This shape had a T1 treatment which is very flexible and easy to bend and conform to tight radii.
 |
| 3/4 Inch Finish Trim Molding |
 |
| Edge of Battery Box where Seal will be Attached |
 |
| Trim Interface with Hurricane Hinge |
 |
| Trim Interface with Lip Trim |
 |
| Edge Trim Profile - Passenger Side |
To trim out the corners, I used some 1 foot cutoffs from some 3/4 x 3/4 inch angle trim I will be installing near the bottom of the trailer. I minimized the screw holes and applied caulking to the back side of the angle before screwing into place.
 |
| 3/4 x 3/4 Inch Angle used for Edge Trim - Passenger Side |
 |
| Trim Interface - Top Passenger Side |
 |
| Edge Trim Installation - Driver Side |
I decided to trim out the inside edge of the battery box that faces the trailer so I can attach a rubber seal to this area. I have a different idea in mind to cover the interface of the battery box and the trailer front, but it will require running an aluminum angle through a roll bender and I don't want to wait to use the trailer while those pieces would be fabricated. I will explain later when I get to the installation of the the battery box.
 |
| Edge Trim Installed - Drivers Side |
 |
| Edge Trim Installed - Passenger Side |
 |
| Profile of Edge Trim |
 |
| Trim Out Complete |
 |
| Install of Rubber Hatch Seal - Profile |
 |
| Rubber Hatch Seal Front View |
Midway through the build, I constructed the frame to support the battery box but never got around to painting it or welding on the tabs to hold the floor down. I took care of that loose end this weekend.
 |
| Ears to Attach Plywood Floor for Battery Box - Same on Drivers Side |
 |
| Primed and Painted the Frame |
I took the floor board down into the basement to coat the surfaces with bed liner to protect the floor from the elements. I also applied the the bed liner to the bottom edge of the battery box as added protection to an area that is subject to receive a lot of tire spray when towing in the rain. I have seen several builds that have coated the entire box front with bed liner, as it will receive the brunt of rock and stone damage from off-road use. I prefer the aluminum look, but ultimately I'm sure I will coat the box with bed liner once it gets dinged-up.
 |
| Edges Coated with Bed Liner - 2 Coats |
I also needed to address the interface of the trailer frame and main trailer box. I placed the butyl rubber seal on the frame before setting the sidewalls and it left kind of an ugly gap where water can get in between the frame and sidewall. The water cant get to the inside of the trailer, but water will come in contact with the wood and prematurely decay the sidewalls. I was thinking of placing trim in this area, but it's just an area for water to collect, so I decided to place black caulking at this joint to eliminate the problem and have water run over the sidewall and frame.
 |
| Joint at Sidewall and Frame |
 |
| Joint at Sidewall and Frame - View 2 |
 |
| Joint Caulked - Same on Driver Side |
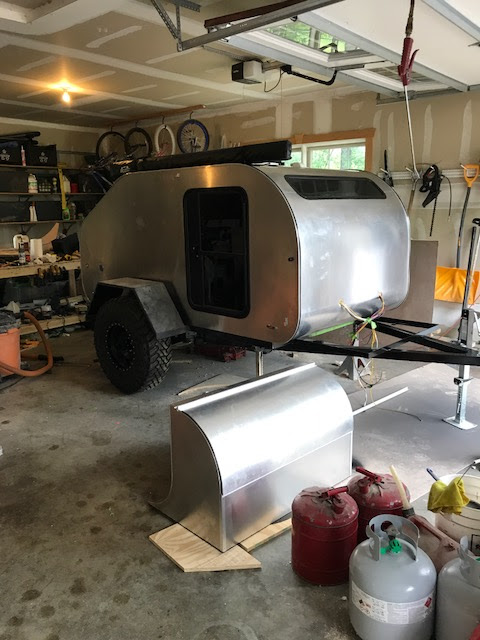 |
| Overall View of Progress |
My side awning came in this week and I decided to set it on top of the trailer for now to keep things off the floor. Makes make want to get started on the roof rack to get one more thing off the to-do list!


No comments:
Post a Comment